Noah's Ark Diaper Cake Instructions

The story behind these diaper cake instructions below: Our readers wanted to know how Artemisia made her cute & clever Noah's Ark Diaper Cake. We asked her and she generously shared her detailed instructions with us! Artemisia, THANK YOU for inspiring us (step-by-step) with your creativity!!

Noahs Ark diaper cake

Also found below are step-by-step pictures of how to make Artemisia's Ark Frame

Artemisia's Instructions:

Noah’s Ark Diaper Cake Instructions

Supplies You’ll Need

Diapers
• Rubber bands to secure the rolled diapers
• Felt (blue, beige or brown)
• Ribbon (blue or pink)
• Thick cardboard to construct the frame of the Ark (boat)
• Packing tape and scotch tape
• Wooden chopsticks
• Multi-color marker pens
• Glue gun
• Small stuffed animals and/or plastic/rubber animals to decorate Noah’s Ark
• Baby items such as baby blanket, baby bottle, bath toys, bib, booties, pacifiers, rattles, socks

Constructing the Noah’s Ark Diaper Cake

The size dimension of Noah’s Ark will be determined by how large a Diaper Cake you desire but it should be at least two inches taller that the height of a rolled diaper sitting up vertically. The shape of the Ark is also at your discretion. The more items i.e. diapers and baby items you want to place in the hold (inside) of the Ark will also determine the depth of the cargo hold. Search the Internet for different shapes of Noah’s Ark.

• Cut a large square out of the cardboard to act as the base. Cover it with blue felt and secure it with a glue gun. The base will depict the water and the Ark (boat) will be placed on top of it.

• Draw a large circle on another piece of cardboard. Cover it with beige or brown felt using a glue gun to secure the felt to the cardboard. Cut out the circle. Cut the circle in half to make two half circles which will be the sides of the Ark (boat). see diagram below

• Draw a slightly smaller circle on the cardboard. Cover it with beige or brown felt using a glue gun to secure the felt to the cardboard. Cut out the circle. Cut the circle in half to make two half circles which will be the front and back of the Ark. see diagram below

• Assemble the frame of the Ark by attaching the front and back of the Ark to the sides using the glue gun.

• Roll all the diapers and secure each one with a rubber band. Place all of the rolled diapers in to the hold (inside) of the Ark.

• Place small baby items in the hold of the Ark as space allows.

• Construct the deck of the Ark to cover the diapers in the hold from cardboard. Cover it with beige or brown felt and secure it with a glue gun. Place the deck on top of the diapers.

• Make a ladder using wooden chopsticks and color it black or brown and glue to the back of the Ark.

• Make the cargo net in the back of the Ark with strips of brown felt.

• Make a colorful Noah’s Ark sign with colorful marker pens.

• Make a colorful sign with the baby’s name using colorful marker pens.

Decorating the Noah’s Ark Diaper Cake

Decorate the deck of the Ark with small stuffed animals and/or with small plastic/rubber animals. Use colored ribbon where desired.

Artemisia's noahs ark diaper cake instructions

Noah's Ark diaper cake

Step-by-Step Picture Diaper Cake Instructions of how to make the Noah's Ark frame

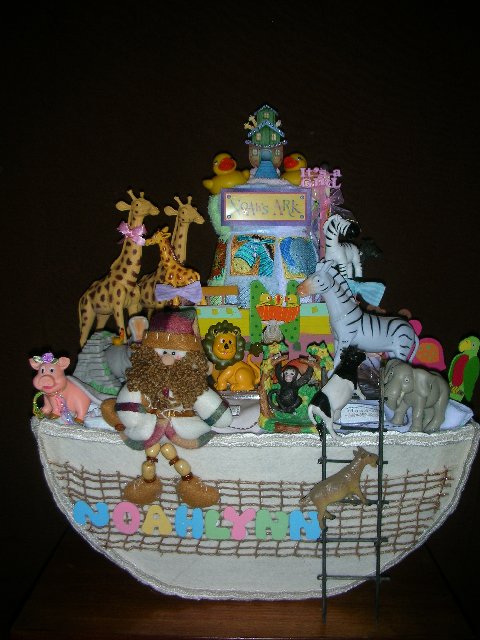
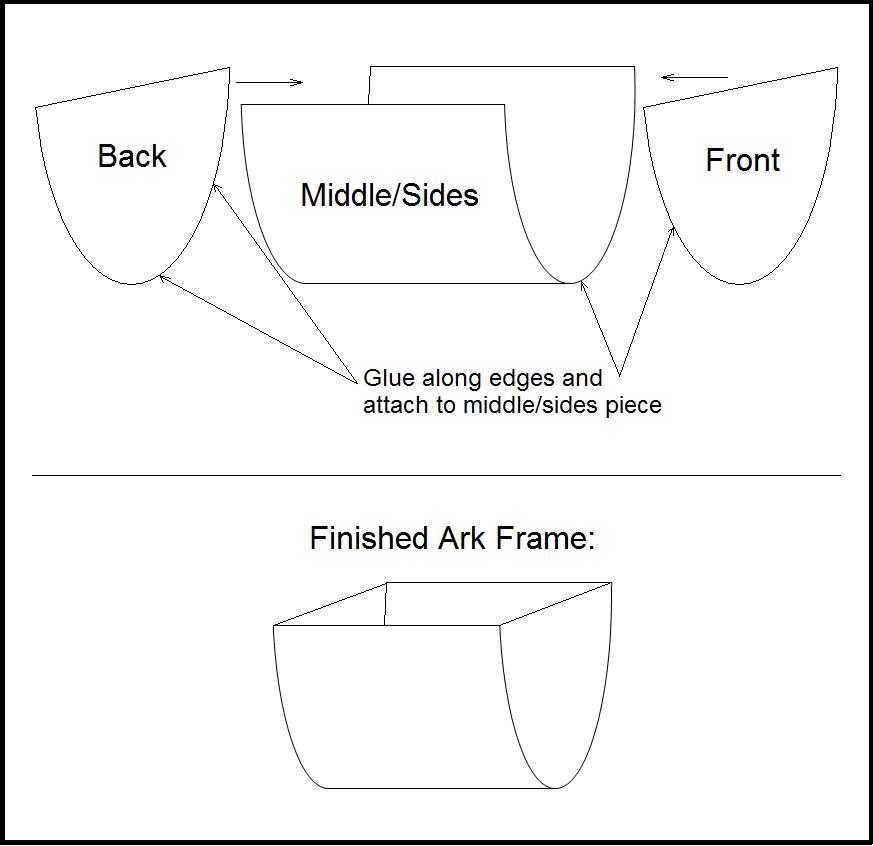
Cut out the circle for the front and back
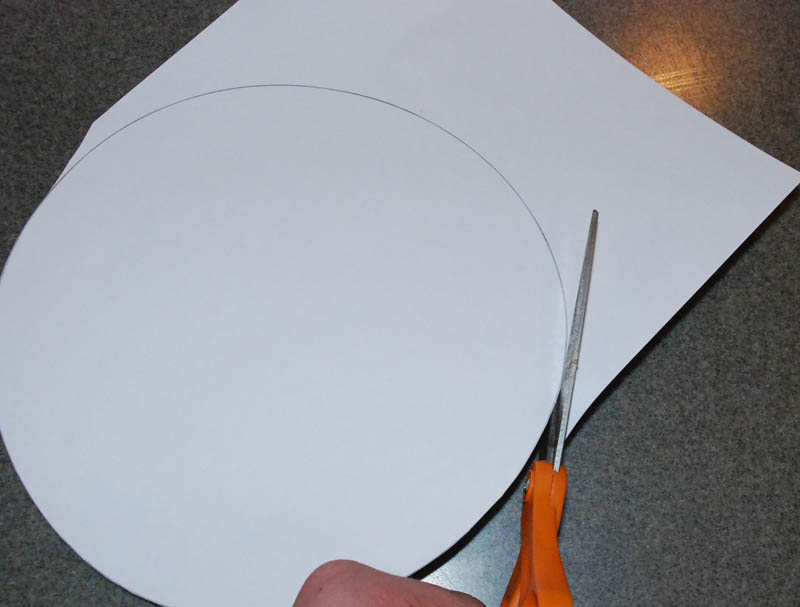
Noah's Ark diaper cake


Cut the circle in half
Noah's Ark diaper cake


Cut out the middle rectangle section, make sure it is long enough to extend the length of the half circles. Scotch tape is actually easier and quicker than using glue.
Noah's Ark diaper cake


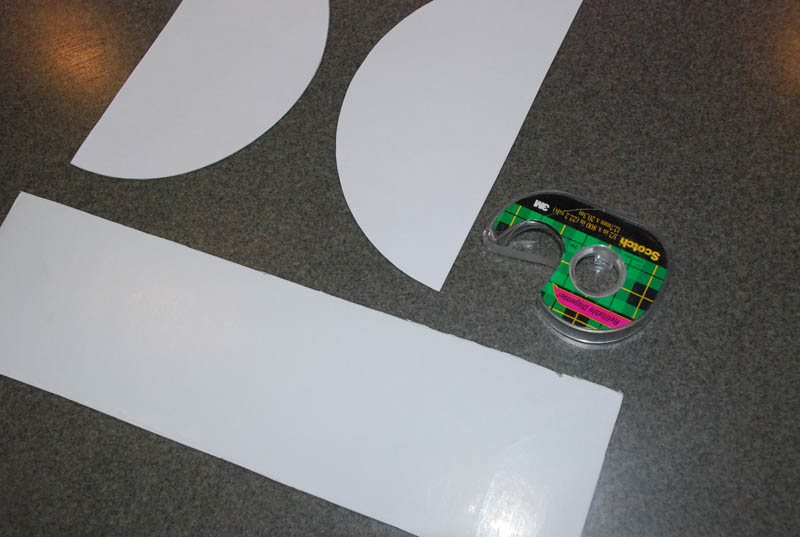
Align the corner of the half circle with the long end of the middle
Noah's Ark diaper cake


Place a piece of scotch tape to fasten the edges of the front and middle together.
Noah's Ark diaper cake


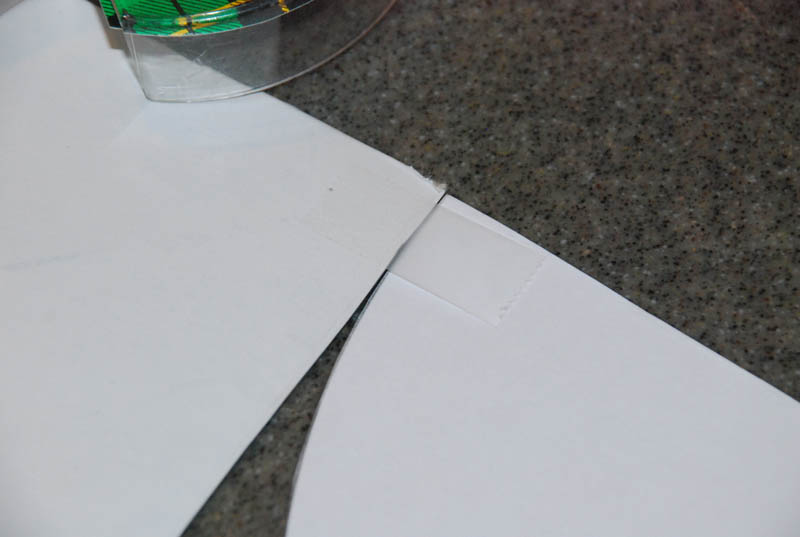
Continue taping the edge together, you'll need to bend the middle rectangular piece to match the curvature of the half circle.
Noah's Ark diaper cake


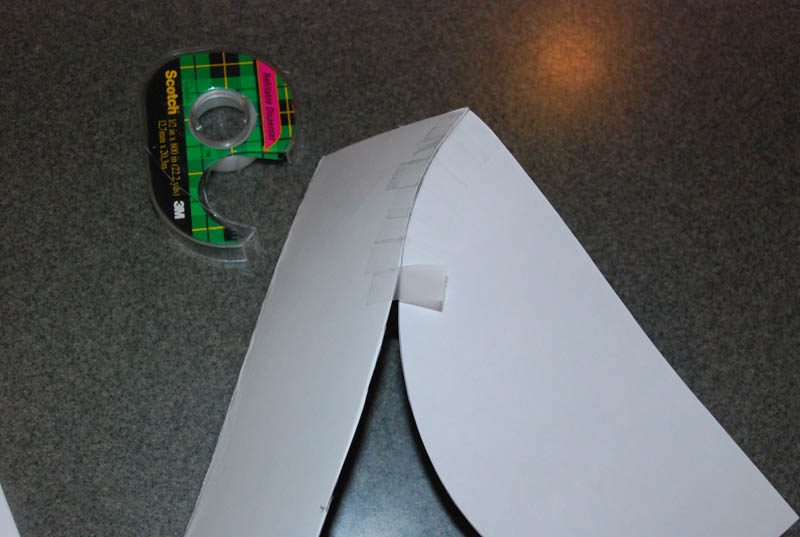
It is easier to place pieces of scotch tape along the half circle edge all at once
Noah's Ark diaper cake


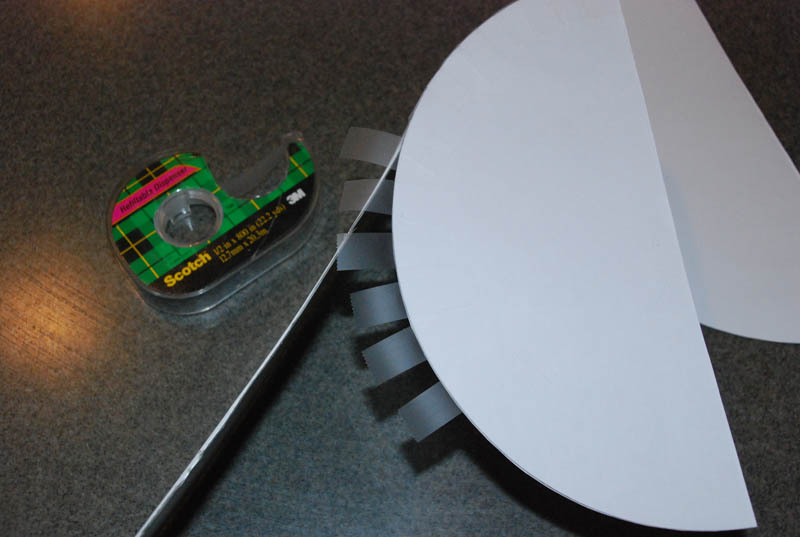
Then as you curve the rectangular section, you'll just fasten the tape pieces one by one to secure the edges together.
Noah's Ark diaper cake


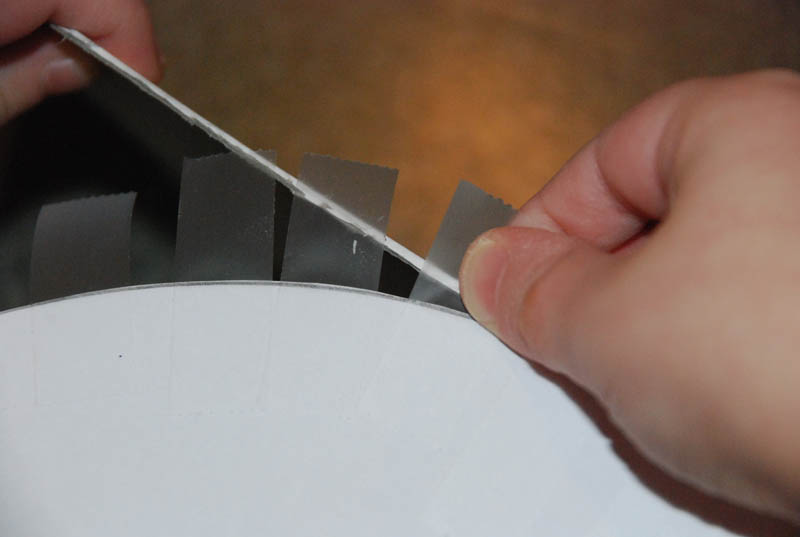
This is what the completed side will look like. It only takes a few minutes!
Noah's Ark diaper cake


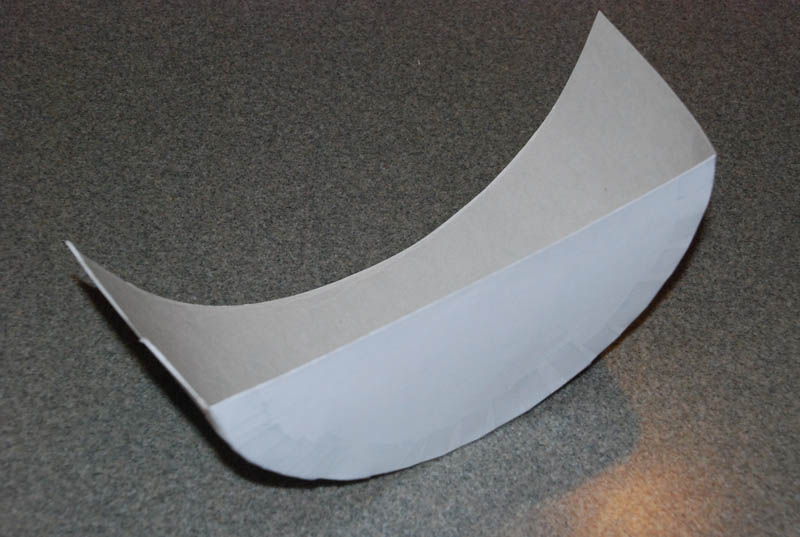
Then begin doing the same thing to the other side.
Noah's Ark diaper cake


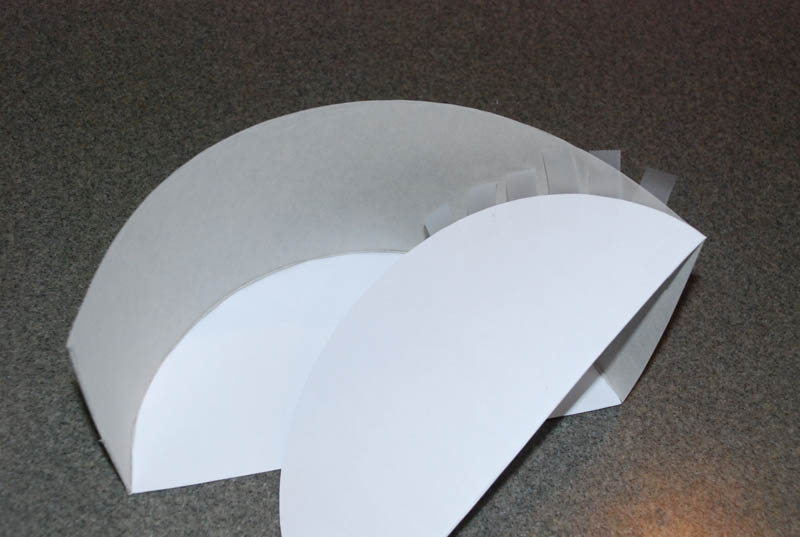
Continue taping until both sides are done.
Noah's Ark diaper cake


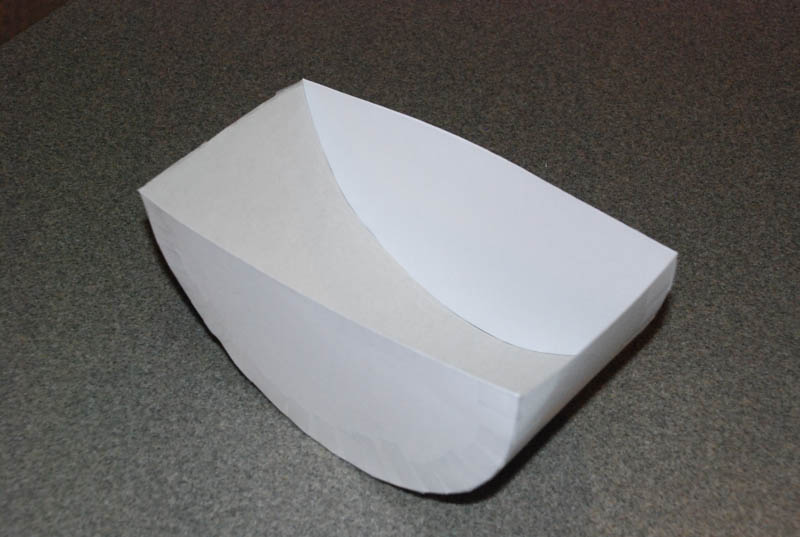
Once the ark frame is done, then begin gluing the felt to the ark, as Artemisia describes above. You could use brown or tan felt to look like a wooden color.

Then roll diapers and place in the ark, or fill with other baby items.

Noah's Ark diaper cake

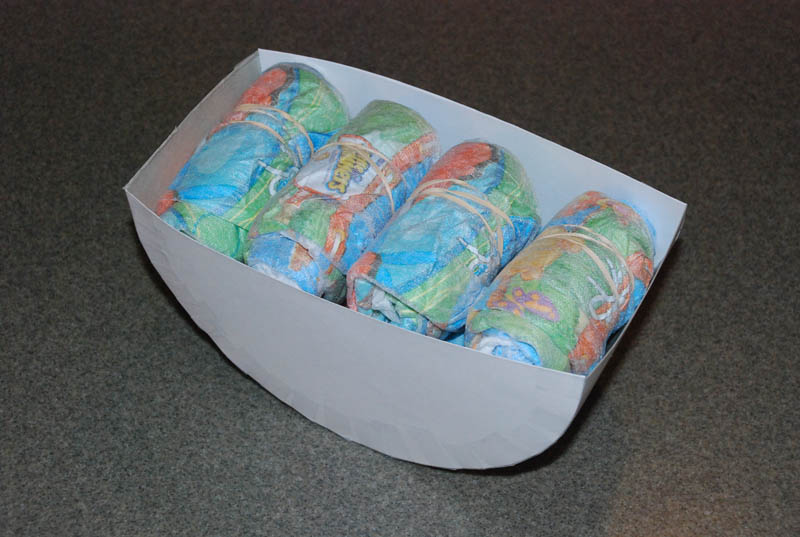
Then you could cut out a rectangular deck to cover the diapers and fasten it with tape - this would give you a nice flat platform for you to decorate the top of the ark with. Or you could just decorate on top of the diapers, which is how it appears that Artemisia did it, because you can see the diapers underneath the animals on the ark.

Noahs Ark diaper cake

noahs ark diaper cake instructions


Check out our Diaper Cake Photo Gallery

Here are more diaper cake instructions with step-by-step pictures...