Abby's Pink & Brown Creative Diaper Cake

Abby's Comments & Recipe:
I had never even seen or heard of a diaper cake before I cam to your website. I am not crafty at all, but it was not too hard to make. I got almost everything from Wal-Mart. I used: From the baby aisle:
50 diapers size 1 - $6.67
1 pak 5 onesies - $10.00
1 pair slippers - $5.00
My first doll - $6.00
3 hair bows - $3.00
From the wedding aisle:
1 pak 10" cake boards - $5.00 - I used three of them
1 package cake pillars - $3.50
From the craft aisle:
2 paks striped ribbon - $2.97 each
From the local craft store:
3 yards of tulle (6" wide), 4 fake flowers, 2 yards
pink ribbon with wire - $5.25
2 7/16" wood dowels - $.89 each
Total of $55.07 From the house:
craft wire, double stick puffy tape, 3 rubberbands and duck tape.
I also bought from Wal-Mart (but returned after I used):
1 10" cake pan
1 8" cake pan
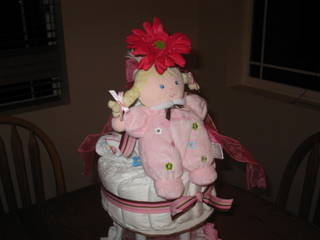
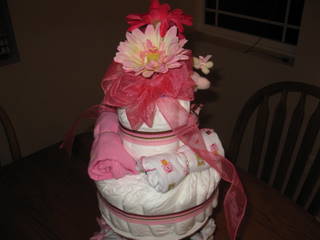
I used the 10" cake pan for the bottom layer and fanned the diapers in side the cake pan to make a circle. I also rolled one diaper up individually in the center for support. I then put a rubberband around it to hold it together and took it out of the cake pan. I also repeated with the 8" pan. I took the remaining 6 diapers and rolled them up an put a rubberband around them for the top layer and adjusted all diapers to make them evenly spaced. I took the cake boards and cut them to size for each layer having one for the bottom (I left it at 10"), one for the top of the bottom layer cake (under the pillars) and one for the top of the pillars under the second layer. The boards under and on top of the pillars are the same size. I then placed the pillars on the boards and spaced them apart as how I would like it to look. The pillars are hollow and I put my pencil inside and traced a small circle that would show me where to cut holes for the dowels. I copied each hole for all three cake boards and cut the holes. My husband cut the dowels about 15 inches long to go through the bottom board, bottom cake layer, cake pillars and halfway through the second layer to give support. I cut the tulle in half and ran a piece of thread through it to make a circle that could sized for the base of the bottom layer cake and taped it with duct tape to the bottom board. I taped the flowers to the board. I tied ribbon around each cake layer over the rubberbands and tied in a square knot. I then started assembling each layer pushing the diaper cake layers gently through the dowels. I rolled up three onesies and tied with craft wire in the center. I placed hair bows over the craft wire and used double stick puffy tape to secure the onesies and shoes to the bottom layer. I put the extra tulle in the center to hide the boring carboard cake board. I rolled up the remaining two onesies and placed them on the second layer. I then took the two other flowers and arranged them in the center of the top cake using the stems to go into the center of the second layer cake to add support. I made a simple bow with the ribbon and craft wire and wired it to the flowers. I also used the craft wire to attach the doll around the neck to the flowers. Even though there were three diaper cakes at the baby shower, everyone thought mine had been professionally done. I think adding the extra flowers, the tulle on the base and the extra height from the pillars was the magical touch. Thanks for your help! Abby
Fountain Green, UT 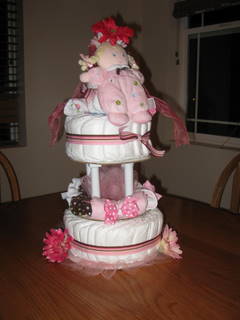
Thanks so much Abby!! Your friend is a lucky lady to get this lovely diaper cake! | 


